
Array formulas in Excel are a great tool for performing time-series calculations or sensitivity studies on input variables.
An array is a group of cells that can be treated as one entity. There are two types of arrays: one-dimensional (values in rows OR columns) or two-dimensional (values in rows AND columns).
An array formula is a formula that works on a group of cells by treating that group of cells as a single entity. Array formulas can return values to a single cell or multiple cells.
Why Arrays?
Some calculations are much easier to do with arrays or array formulas. For example: summing the “n” largest or smallest numbers from a range.
Personally, I like to use arrays for time-series calculations or other calculations where I’m investigating how an output changes as a function of an input variable. Array’s are a convenient way to refer to a range of cells when combined with named ranges, as I’ll explain below.

Elevate Your Engineering With Excel
Advance in Excel with engineering-focused training that equips you with the skills to streamline projects and accelerate your career.
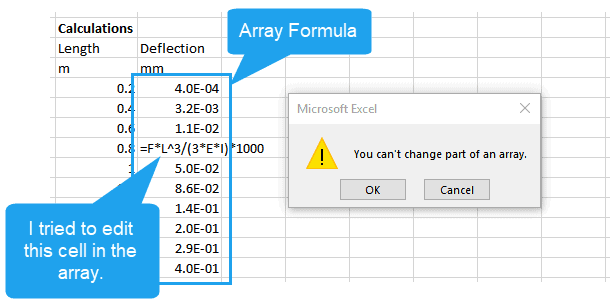
Arrays also provide protection against inadvertent changes to individual cells in a time-series or other calculation. Once an array formula is entered, Excel does not allow changes to any cell within that array, unless the entire array is edited at once.
In the simple cantilevered beam deflection example below, I tried to edit one of the cells in the column containing deflection values. When I do so, Excel prevents me from making the change (and saving me from introducing an error in my spreadsheet):
Working with Array Formulas in Excel
1. Use Ctrl+Shift+Enter
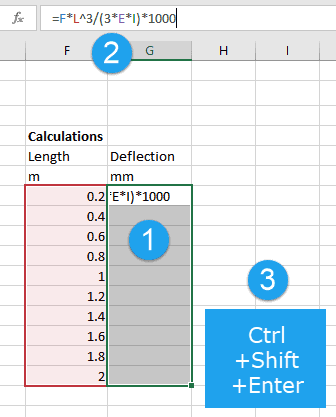
The most basic component of working with array formulas is that you must enter them by using Ctrl+Shift+Enter (or CSE for short). The process for creating an array formula is as follows:
- Select the cells that will contain the array formula
- Enter the formula either by just beginning to type, or through the formula bar
- Once finished entering the formula, type Ctrl+Shift+Enter to enter the formula into the array
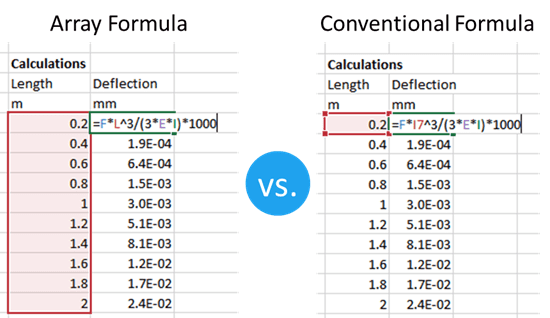
2. Use Names to Refer to Arrays
As I mentioned above, one of the things that I really like about arrays is that they offer you the ability to include named ranges in time-series or other table formulas that would otherwise be forced to use cell references. With array formulas, your spreadsheet formulas will be much easier to read and interpret with named cells.
3. Select Arrays with a Keyboard Shortcut
When editing an existing multi-cell array formula, we’re required to select and edit the entire array (as shown above). This can be a bit tedious, but fortunately there is a shortcut to help us out:
With any cell in the array selected, simply press “Ctrl” and “/” (forward slash) simultaneously, and the entire array will be selected. Then just press the F2 key or edit the formula in the formula bar. (Don’t forget to type Ctrl+Shift+Enter when you’re done!)
Negatives Associated with Arrays
Having many large arrays can slow down your calculations. Usually, this is only noticeable only on very large spreadsheets.
Average users don’t have experience with them, which might be a disadvantage if you want others to modify your spreadsheet. However, if you’re trying to protect your spreadsheet from inadvertent changes (by yourself or others), array formulas in Excel can be a great advantage!