If you’ve used solver before, you’ve noticed that every time you close out the Solver dialog and reopen, your settings are preserved. This is handy because it allows us to quickly test and tune the model without having to reenter all the information again. However, what if you want to make a significant change to the model, but don’t want to lose the original? Thankfully, the folks behind the Solver add-in already thought of this and provided a way for us to save and load Excel Solver models at will in our spreadsheets.
The first part of this post demonstrates how to set up an optimization model using Solver. The second part will show how to save, modify, and re-load the original model. If you are very familiar with how to set up Solver, you can skip right to the second part by clicking here.
Create the Optimization Model in Excel
In this optimization exercise, we’ll be searching for the values of x and y that maximize the following function:

Subject to these constraints:

Elevate Your Engineering With Excel
Advance in Excel with engineering-focused training that equips you with the skills to streamline projects and accelerate your career.

First, enter guess values for the independent variables x and y. Then, enter a formula for the objective function f(x,y).
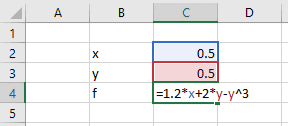
I quickly created names for each of these cells by selecting both the cells with the variable names and the cells containing the values, then clicking “Create From Selection” in the Formulas menu.
Next, we can enter the formula for the left-hand side of the constraint equation in another cell.
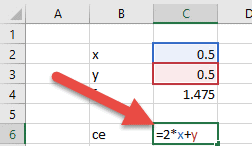
With our independent variables, objective function, and constraint equation entered into spreadsheet cells we can set up Solver.
If you have the Solver add-in installed, you can find it on the far-right side of the data tab. If you’ve never used Solver before, you’ll probably need to enable it. You can find detailed instructions for enabling Solver here.
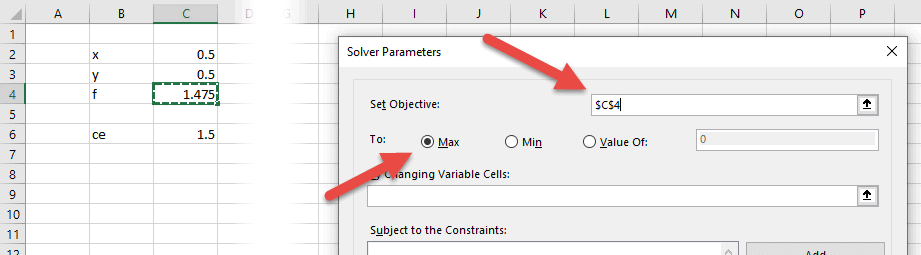
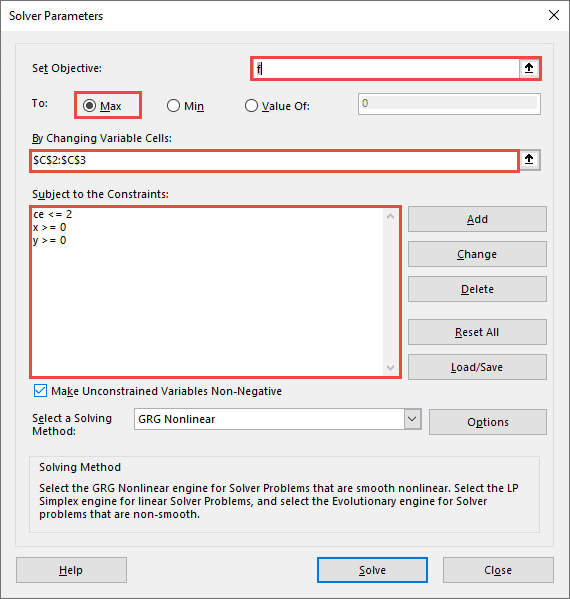
Select the cell containing the objective function formula as the objective, then choose “Max”. Next, select the variable cells.
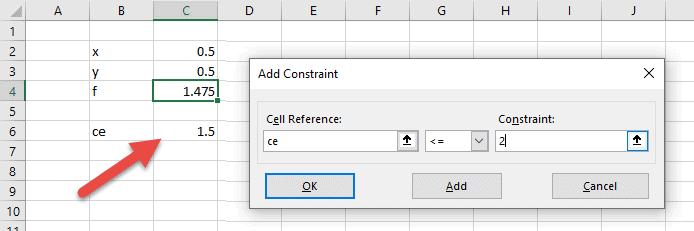
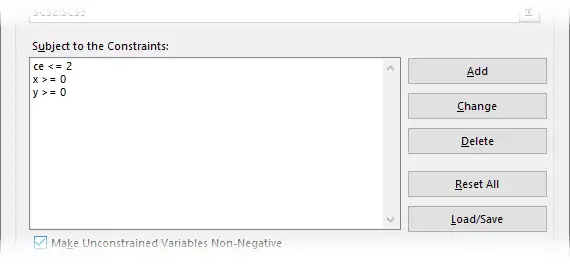
The last step before running the model is to set the three constraints, so click “Add” on the right side of the Solver dialog window to begin entering them.

The first constraint is an equation that includes both independent variables. That’s why we had to enter it as a formula in a cell. There are three steps to setting this constraint:
- Select that cell as the reference (or as I did in this case, type the name of the cell)
- Ensure that the inequality is “less than or equal to”
- Enter a value of 2 for the constraint
Next, click “Add” at the bottom of the “Add Constraint” window, and set the x and y constraints similarly.
Once complete, the Solver window should look exactly like this:
Run the Optimization Model using Solver
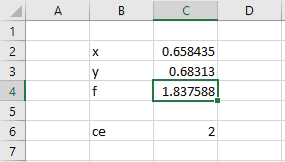
The GRG Nonlinear solving method will work great for this problem because it is smooth, continuous, and the independent variables are constrained to a small region.
So, after clicking Solve, the add-in will do its optimization and return a result that meets all the constraints:
Save the Excel Solver Model
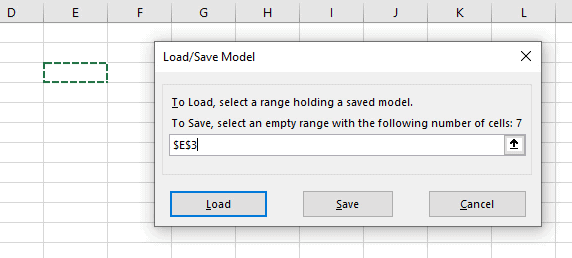
To save the model, reopen the Solver add-in. On the right side, in the lower third, there is a button label Load/Save. Click this to open the “Load/Save Model”
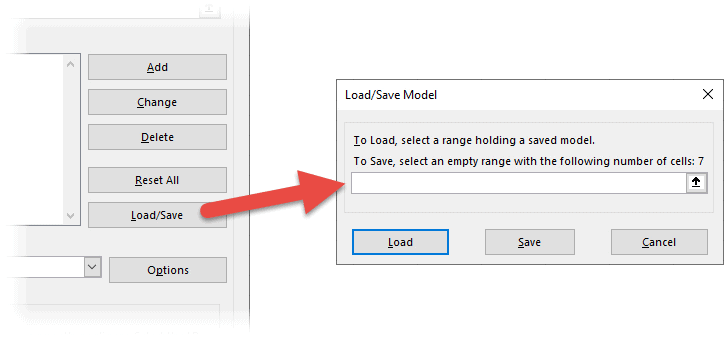
Next, select a cell on the worksheet where information about the model can be stored. The instructions will tell you that you’ll need to select a range containing “n” cells, but that’s not necessary. You’ll only need to select one cell. Just make sure there is enough empty space below that cell to store (n-1) cells of data.
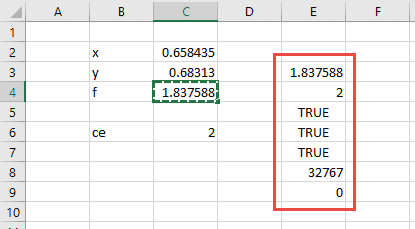
Finally, click Save. Solver will write information to those cells, and you’ll see something like the following:
Modify the Solver Model
Now try to modify the Solver model by updating the constraint involving the equation:

Run Solver again and you’ll see a new result for the independent variables and the objective function. You’ll also see that the constraint has been met.
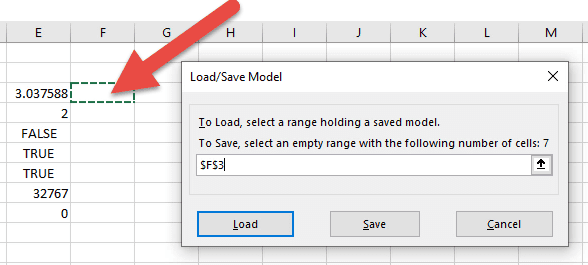
This model can be saved on the spreadsheet as well. Just select a new cell (with empty cells below it) to store the data from this second model.
Load Another Optimization Model into Solver
To load the original model back into Solver, click the Load/Save button again. When the “Load/Save Model” window opens this time, select the entire range of cells that Solver stored on the spreadsheet, then click the Load button.
When asked if you want to replace or merge the model, most of the time you’ll want to use the “Replace” option. This completely removes any of the previous settings and replaces them with those you have loaded. The “Merge” option will append the loaded constraints onto the existing ones and update any of the settings you’ve selected in the Options window.
Now, the original settings are back in our Solver model:
And clicking Solve gives us the original result where the constraint equation was limited to a value of 2 or less:

Investigating the Saved Solver Model
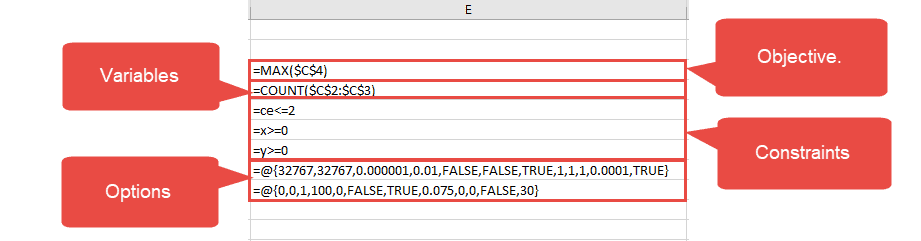
So, what exactly is stored in all these cells on our spreadsheet?
- The first cell contains information about the objective cell and whether to maximize, minimize, or set it to a value.
- The second cell contains the variable cells, stored in a COUNT function
- The next cells are formulas for the constraints. They all evaluate to TRUE in the spreadsheet if they have been met.
- The last two cells contain information about the Solver settings, such as which algorithm to use, convergence criteria, etc.