Excel has a really powerful tool that allows you to conduct optimization, solve systems of simultaneous equations, and perform complex multi-variable regression or non-linear regression. This tool is called the Excel Solver Add In. And although it comes with every purchase of Excel it has to be enabled in your installation before you can use it.
The number of steps required to enable the Solver Add-In is determined by whether or not you have already enabled the Developer Tab. If you are working with a fresh install of Excel or have never enabled the Developer Tab start here. Otherwise, skip down to Enabling the Excel Solver Add-In.
Exposing the Developer Tab
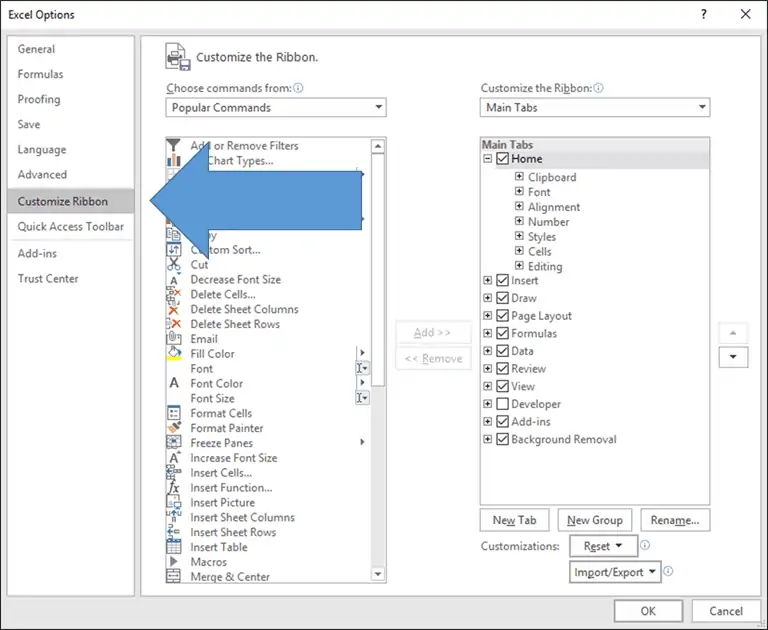
To display the Developer Tab in the ribbon go to File>Options.
In the window that opens, select Customize Ribbon.

Elevate Your Engineering With Excel
Advance in Excel with engineering-focused training that equips you with the skills to streamline projects and accelerate your career.
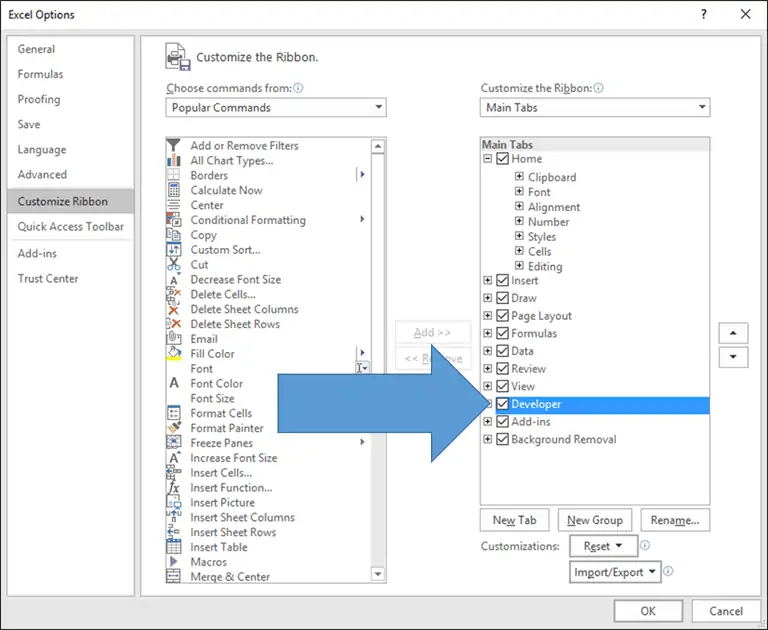
Next, select the checkbox next to Developer in the List Box on the right side.
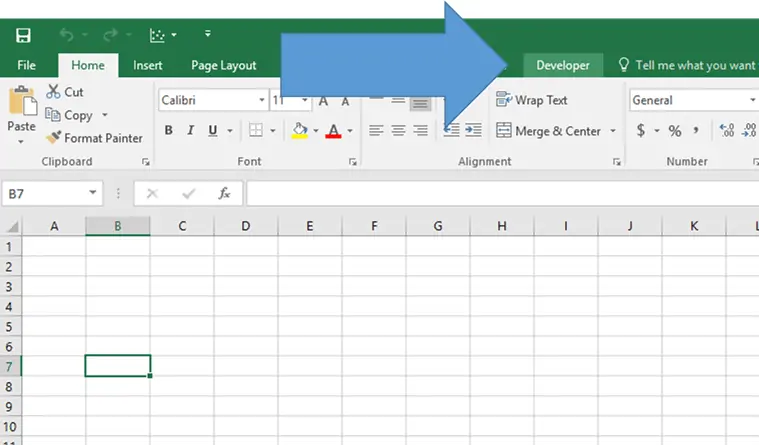
Now the Developer tab will show up as the last tab in the ribbon, on the far right:
Enabling the Excel Solver Add-In
The Solver Add-In is enabled through the Developer tab.
First navigate to the Developer tab and select Excel Add-Ins.
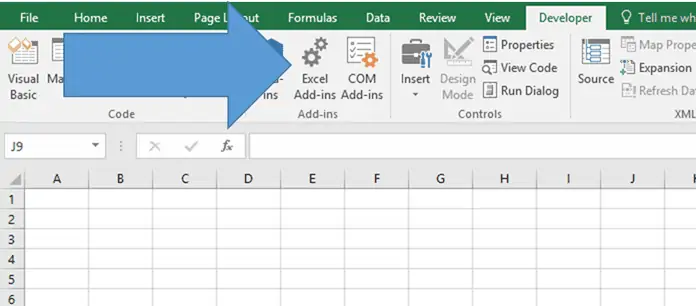
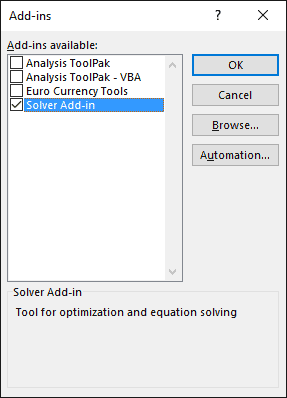
From the list of Add-Ins that appears, select the Solver Add-In and Click OK.
Opening Solver
Once enabled, Solver is accessed via the Data Tab.
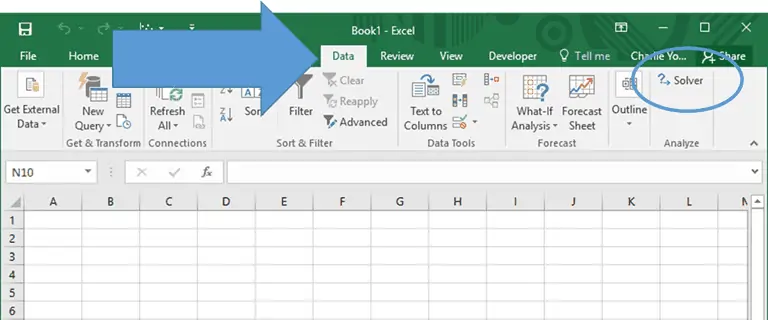
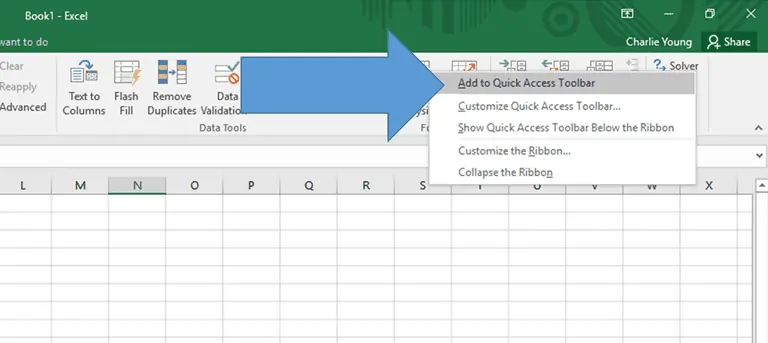
If you don’t like navigating to the Data tab every time you want to use Solver, you can always add a shortcut to the quick-access toolbar. To do this, right-click on Solver (in the Data tab) and select “Add to Quick Access Toolbar”.
A link is added above the ribbon next to Save, Undo, Redo, and any other commands you’ve already added.
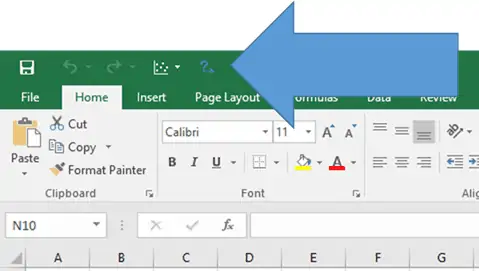
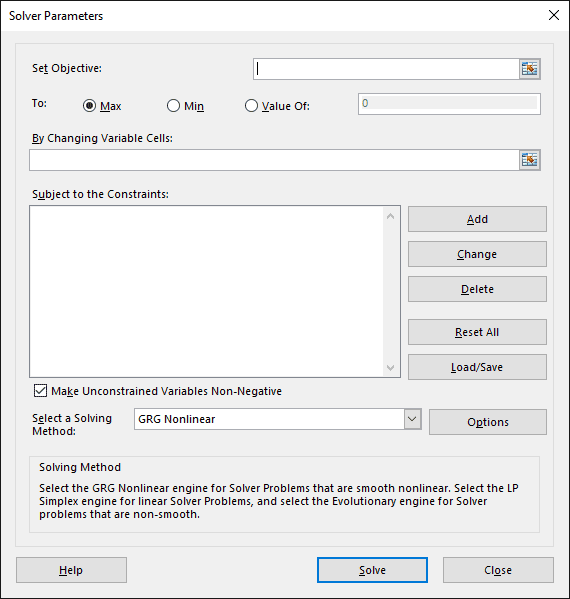
Clicking on the shortcut opens the Solver window, just as you’d expect.
Conclusion
That is how you install the Excel Solver Add In with just a few easy steps. With this add-in enabled, you will be able set up design optimizations and other complex engineering calculations.
