In this post, you’ll learn how to create custom Excel functions to store engineering constants by creating a user-defined function in VBA that can store the yield strength of steel and return it to the spreadsheet.
You’ll also learn how to save your custom functions in an Excel template so they are available whenever you create a new spreadsheet.
Video
Subscribe to EngineerExcel on YouTube
Create Custom Excel Functions for Engineering Constants
User-defined functions can be used for performing calculations, but they can also be used to store constant values.
For example, Excel stores the value of pi as a function. Typing “=pi()” in a cell returns 3.14159265358979.
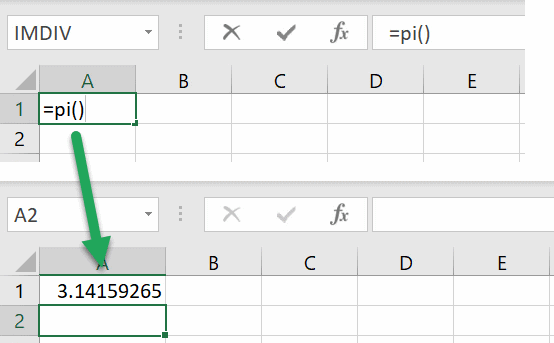
Through VBA, or Visual Basic for Applications, we can set up our own user-defined functions to store constants like material density, strengths, specific heats, or any other constant value that you reuse in your engineering calculations. These functions can be used just like pi() in formulas or even within other VBA functions.
In the example that follows we’ll create a custom Excel function to store the constant value of yield strength for ASTM A36 structural steel.
Engineering Constant Function Steps
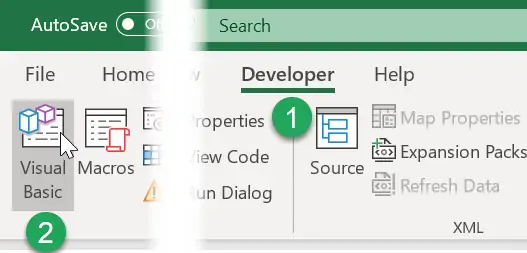
Step 1: Open the Visual Basic Editor
The custom function will be created using VBA or Visual Basic for Applications. To get started, open the Visual Basic Editor (VBE), which is found on the left side of the Developer tab. If you don’t see the Developer tab, you’ll need to enable it.
Step 2: Create a New Module to Store the Custom Function
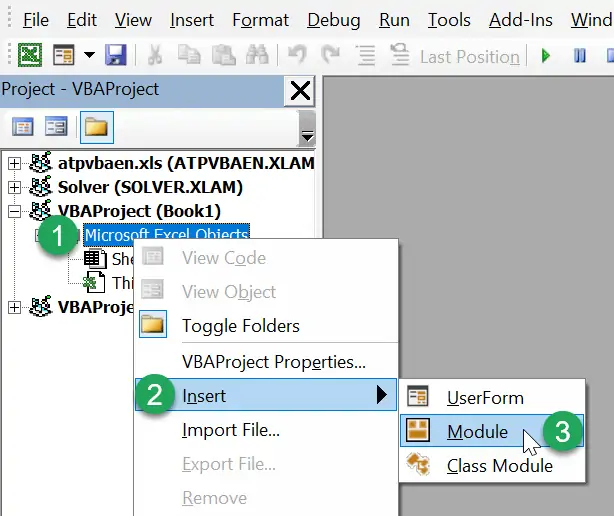
VBA procedures (functions and subroutines) are stored in Modules, so create a new module for the function:
- Right-Click the current workbook (in the example below its “VBAProject (Book1)”) in the tree, or any of its branches
- Select “Insert”
- Select “Module”
Step 3: Rename the Module
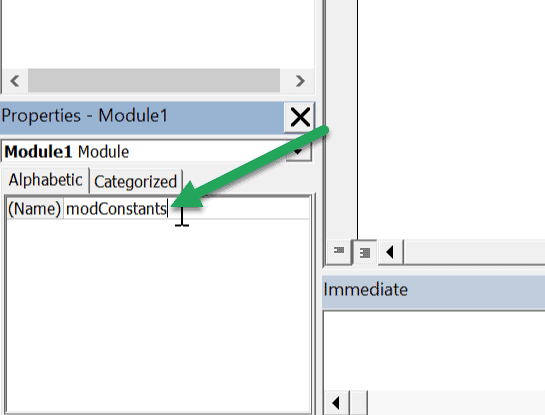
Giving a module a unique name keeps everything organized. Since this module might be used to store constants in the future, a good name would be “modConstants”.
Step 4: Create the User-Defined Function
To create a function in VBA, click inside the Code Window and type the word “Function” followed by the name (Sy_A36) and a pair of parentheses. Normally, arguments would go inside the parentheses to be used in a calculation. However, since this function is returning a constant value, there is no calculation, and arguments are not required. The statement “As Double” following the parentheses tells VBA to store the result of the function as a double precision floating point number. After typing the first line and pressing the Enter key, the VBE automatically adds the closing line “End Function”.

Step 5: Describe the Purpose of the User Defined Function Using Comments
To keep from forgetting exactly what it is this function is doing, and most importantly, the units on the constant value that is being returned it’s a good idea to add some comments. In VBA comments always start with an apostrophe. The apostrophe indicates that the line should not be executed.

Step 6: Complete the Function
To complete the function, set the function name equal to a value. Here the value is 250 (megapascals).

Step 7: Test the Custom Spreadsheet Function
Test out the function on the spreadsheet by typing “=Sy_A36()” in any cell. This returns the value of 250 to the cell.
Don’t forget the parentheses after the function name. Leaving those out will generate a #NAME error.

Step 8: Save the Workbook as a Template
Recreating these functions would be incredibly tedious, but if they are saved in a template that is used to create every new workbook, they will always be available to you or anyone else you share the spreadsheet with.
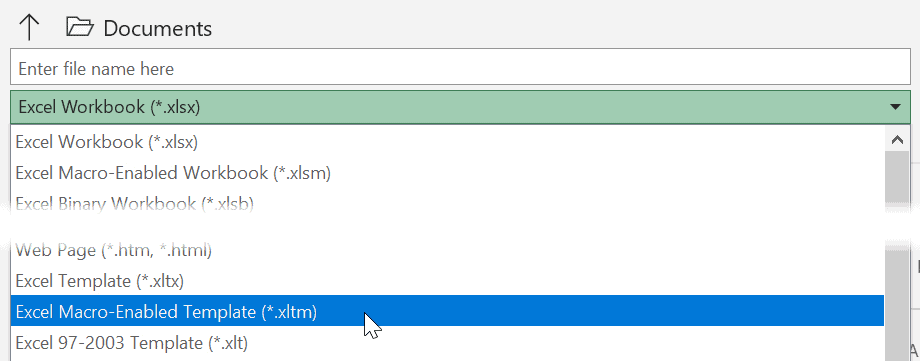
To create a template, select File>Save As and select a storage location.
Then set the file type to Excel Macro-Enabled Template.
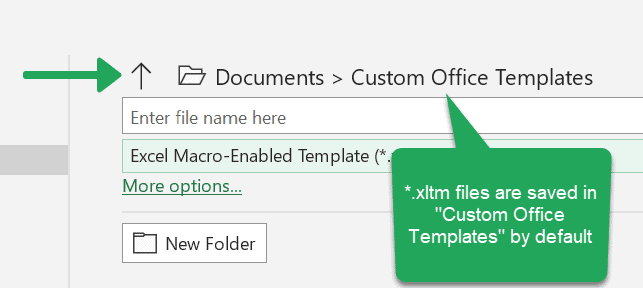
This automatically sets the directory to Documents/Custom Office Templates:
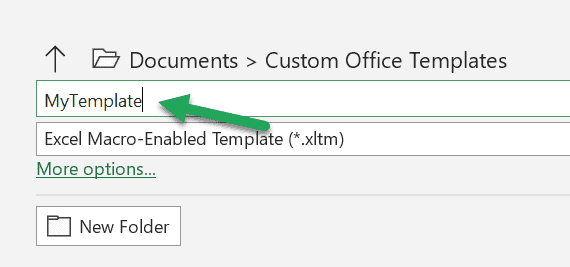
Then give the template a name and click Save.
Step 9: Pin the Template to the Jump List for Ease of Re-Use
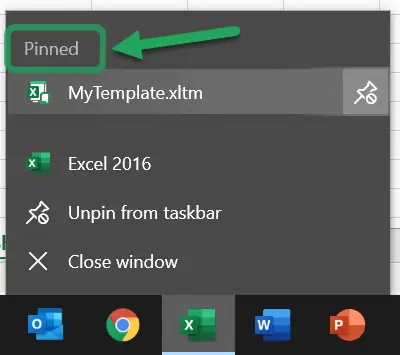
If you have Excel pinned to your task bar, right click on Excel and the file MyTemplate.xltm will be under “Recent”.
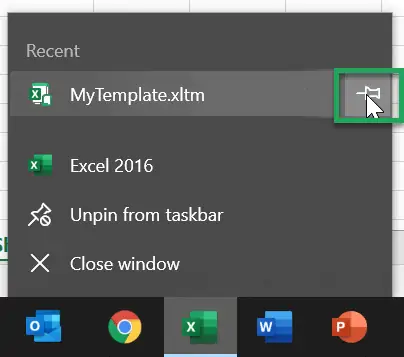
Click the “pin” icon, and the template will now be pinned to the top of the jump list.
Step 9 (Alternate): Pin the Template to the “Backstage”
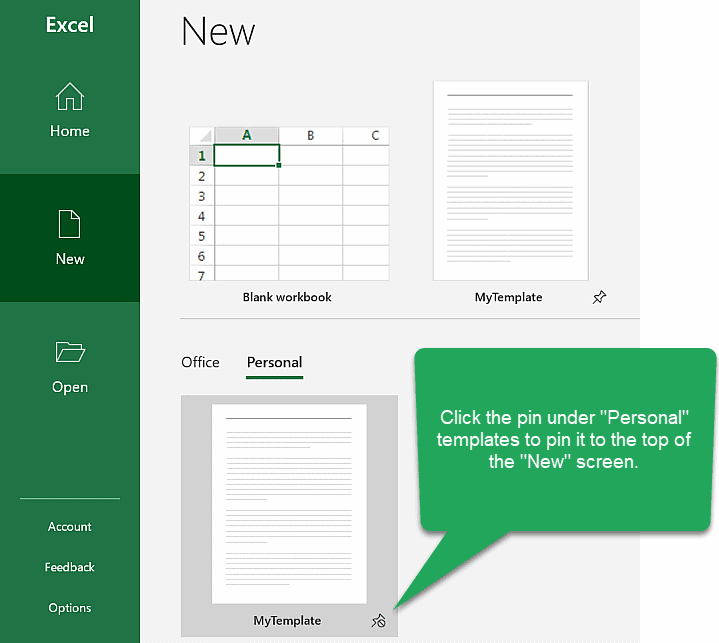
If you don’t have Excel in the task bar, you can pin the template to the Backstage view by doingthe following:
- Open Excel
- Click New
- Find the template in the “Personal” Section and pin it
Result
To create any new worksheet with the constants available, just click on the pinned template and a new Excel window will open.
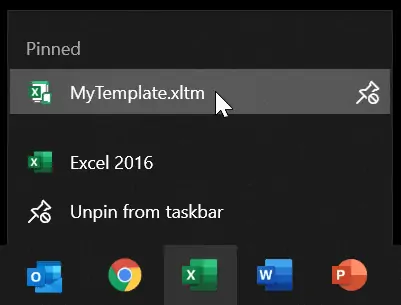
Now instead of Book1, the default file name is MyTemplate1:

Each new spreadsheet created from this template will have the custom functions available for use in any calculations.
