
If you follow my blog or have read my ebook, you know that I’m a big fan of using Named Cells to make cell formulas easier to write and read. Usually, this is done by selecting the cell, clicking in the name box, and typing the cell name. This can be a slow process, but it’s really quick when you use “Create from Selection” in Excel.
Create From Selection in Excel: Quickly Create Named Cells
To ease the pain of creating cell names one-by-one, you can create cell names from a selection, instead, using the “Create from Selection” tool.
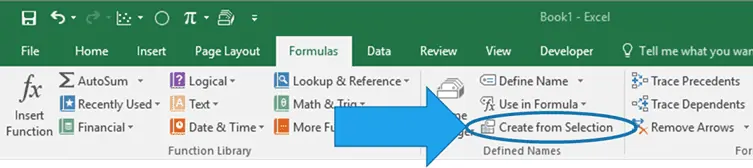
The tool is located in the Formulas menu in the “Defined Names” group.

Elevate Your Engineering With Excel
Advance in Excel with engineering-focused training that equips you with the skills to streamline projects and accelerate your career.
Naming Individual Cells
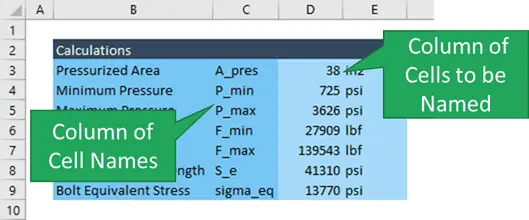
To use this tool, first enter the names of the cells in a column next to the cells themselves:
Next, select both the cells containing the names and the cells to be named, and open the tool from the Formulas tab.
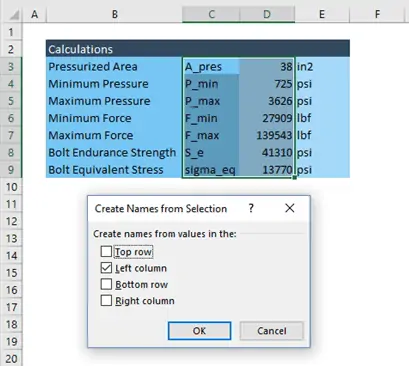
Finally, choose the appropriate position for the cells containing the names, and click OK. In my case, the names were to the left of my cells, but you could also choose top row, bottom row, or right column depending on how you’ve laid out your spreadsheet.
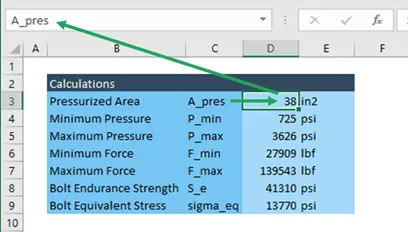
This way of adding names to cells has a couple of advantages. In addition to being more efficient, it also provides good visibility to the names of the cells for future reference.
Naming Arrays with Create from Selection
This method also works for arrays too.
If the values are arranged in a vertical array, add the name to the cell just above all of the values.
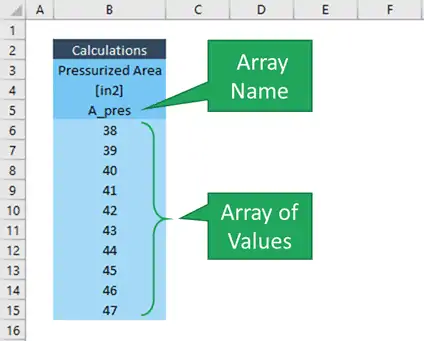
Then select the cell containing the name and all of the cells in the array of values. Finally, in the “Create from Selection” tool, choose “Top Row” instead.
Of course, if your data is in a horizontal array, add the name to the left cell and choose “left column” instead.